How to Get Crowd-Free Travel Photos at Famous Landmarks
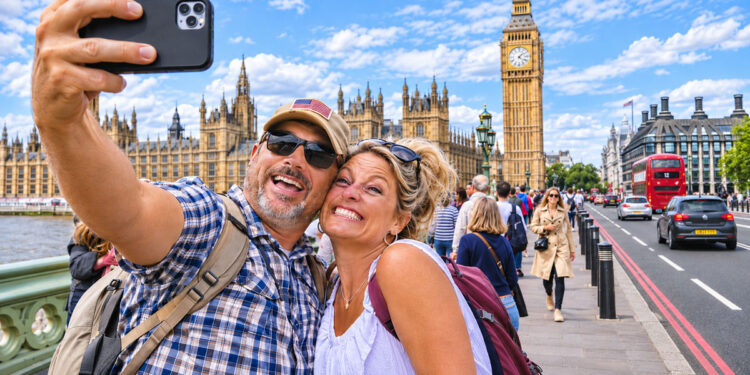
Famous landmarks are popular for a reason. They have impressive architecture, memorable views, and a strong connection to the history or culture of a place. The problem is that the most recognisable locations are often full of visitors. A photo that looked perfect in a traveller’s imagination may include people walking across the frame, standing near the main subject, or gathering around the same viewpoint.
Getting a cleaner travel photo does not always require visiting at an unusual time or waiting for every person to leave. A careful combination of planning, camera technique, and simple editing can help travellers create a more focused image.
For small distractions, a remove person from photo online free tool can be useful after the trip. It can help clean up a background while keeping the main landmark and important details visible. The best results usually come from combining this type of editing with good preparation before taking the photo.
Choose the Right Time of Day
The easiest way to reduce crowds is to visit when fewer people are likely to be there. Early morning is often a good option, especially on weekdays. Many tourists arrive later in the day, while local commuters may pass through quickly and leave the area less crowded afterwards.
Other useful times include:
- Shortly after sunrise
- During the last hour before sunset
- On weekdays
- Outside major holidays
- During light rain
- During colder or less popular seasons
Each location has its own rhythm. A famous square may be quiet early in the morning but crowded by midday. A viewpoint may become busy at sunset but nearly empty during the late morning.
Travellers should check the opening hours, local events, and weather before visiting. A small amount of planning can make a bigger difference than editing later.
Look Beyond the Main Entrance
Many visitors take photos from the most obvious position. This creates a familiar image, but it also creates a crowded one.
Walking around the landmark can reveal a different angle. A side street, nearby bridge, upper-level viewpoint, or less popular path may show the landmark with fewer people in the foreground.
Possible adjustments include:
- The photographer’s position
- The distance from the landmark
- The height of the camera
- The direction of the light
- The amount of sky in the frame
- The relationship between the landmark and nearby buildings
A different viewpoint can make the image feel more personal. It may also place passing visitors behind the main structure rather than directly in front of it.
Use Composition to Reduce Distractions
Good composition can make a busy location feel calmer. Placing the landmark where it has enough space around it and using natural lines can help guide attention.
Useful composition elements include:
- Doorways
- Arches
- Trees
- Fences
- Streets
- Reflections
- Shadows
- Walls
- Windows
These elements can frame the landmark and block parts of the crowd. A doorway may create a natural border around a building. A long street can lead the viewer’s eye towards the subject.
Placing the main subject slightly to one side instead of directly in the centre can create space for the landmark while reducing the number of people crossing the most important area.
Wait for Short Gaps
Crowds are rarely completely still. Even in a busy place, there may be a brief moment when the area in front of the landmark becomes clearer.
Photographers can watch the movement pattern and prepare the camera before the gap appears. Those using a phone can keep the camera open and hold their position, taking several images when the space clears.
This method works especially well near:
- Narrow doorways
- Popular stairs
- Viewpoints
- Bridges
- Famous statues
- Building entrances
Burst mode can help capture several frames quickly. Later, the photographer can choose the image with the cleanest foreground.
Use a Longer Lens or Zoom Carefully
Moving closer is not always the best way to make a landmark look larger. A longer lens or moderate zoom can compress the scene and reduce the amount of foreground space.
This can help when people are walking close to the camera but the landmark is farther away. It may also create a more balanced relationship between the landmark and the background.
Extreme digital zoom is best avoided if it makes the image soft. Photographers should use the highest quality setting available and check the result before deleting the original wider image.
A longer focal length can also make it easier to isolate architectural details, signs, windows, domes, or statues instead of showing the entire crowded area.
Use a Tripod for Moving People
When the landmark itself is not moving, a tripod can create opportunities to reduce people through multiple exposures. Taking several images from the same position over a period of time allows visitors to move through the frame, revealing different parts of the background in different images.
These frames can be combined manually in an editor, using the clearest parts from each exposure. This method requires a steady camera and consistent framing.
It works best when:
- The camera remains fixed
- The landmark is still
- The light does not change quickly
- People move through different areas
- The photographer has enough time to capture several frames
If clouds, shadows, or lighting change significantly, combining the images may require extra editing.
Try a Slower Shutter Speed
A slower shutter speed can make moving people appear blurred or less noticeable. This is useful for creative images where the landmark remains sharp while the crowd becomes a soft movement in the foreground.
The photographer may need:
- A tripod
- A neutral density filter in bright conditions
- Manual camera controls
- A stable shooting position
This technique requires care. If people stop in the same place, they may remain visible. Movement blur can also make the image look unusual if the rest of the scene is very sharp.
For a natural-looking travel photo, taking both a standard exposure and a slower version allows the photographer to decide later which one better matches the mood.
Photograph Details Instead of the Whole Landmark
A famous landmark does not always need to appear in its entirety. Architectural details can create a more focused and less crowded image.
Possible subjects include:
- A doorway
- A carved detail
- A tower
- A window
- A roofline
- A statue
- A sign
- A reflection
- A pattern on the wall
Close-up images are easier to compose because fewer people appear in the frame. They can also tell a different story about the location.
A series of detail photographs may be more interesting than one wide image that looks like thousands of other tourist photos.
Ask for a Clear Portrait Area
Travellers wanting a photo of themselves at a landmark can choose a position with a simple background. A large open space may look attractive, but it can also contain many people.
Suitable locations include:
- A quiet wall
- A side path
- A corner of the building
- A raised platform
- A less popular viewpoint
- A background with strong lines
A travel companion can take several photos rather than just one, with simple instructions about framing and where the subject wants to stand.
Taking a wider image and cropping it later also provides more flexibility if someone briefly enters the edge of the frame.
Edit Small Distractions Carefully
Even after careful planning, a few people may remain in the image. Editing can help remove small distractions, but it should be used carefully.
Common editing tasks include:
- Removing a person in the background
- Cleaning an empty area
- Repairing a wall or floor
- Removing a sign or temporary object
- Extending the sky
- Correcting a small obstruction
When using an online editing tool, the selection should cover only the unwanted area. A large selection may change nearby architectural details or create repeating textures.
A full-size review of the edited area can reveal:
- Repeated patterns
- Straight lines that bend
- Missing building details
- Strange shadows
- Unnatural textures
- Objects that appear to merge
If the result looks unusual, the photographer can undo the edit and try a smaller selection.
Protect the Main Landmark
The landmark is usually the reason for the photograph, so editing should not change its identity or important details. Removing people who are part of the landmark’s context is best avoided if doing so makes the scene look misleading.
Elements that should remain unaltered include:
- Historical features
- Artwork
- Signs
- Architectural details
- Safety barriers
- Important cultural elements
For travel memories, light clean-up is usually enough. Editing should improve focus while preserving a faithful impression of the location.
Consider Privacy and Local Rules
People in the background may not be the focus of the image, but they are still individuals. Anyone publishing travel photos should be thoughtful about privacy, especially if a person is clearly identifiable or appears in a sensitive situation.
Those creating commercial content should check local rules and platform policies before publishing edited images. A personal travel photo and a paid advertisement may have different requirements.
Removing people should not misrepresent a public event, a safety condition, or the normal experience of a location.
Save the Original Image
The original file should always be kept before editing. Saving the edited version separately allows the photographer to compare the changes or create another layout later.
Useful file names may include:
- landmark-original.jpg
- landmark-clean-background.jpg
- landmark-social-crop.jpg
- landmark-banner-version.jpg
The highest-quality original should be retained, even when a compressed version will be published online.
Check the Image at Its Final Size
An edited photo may look natural on a large screen but reveal problems when printed or used in a wide banner. Reviewing the image in the size and format where it will appear can help identify issues.
Areas to check include:
- The main subject
- The edges of the frame
- Removed areas
- Text placement
- Image sharpness
- Colour balance
- Background continuity
A small imperfection may not matter in a phone story, but it may be visible in a large website header.
A Simple Crowd-Free Photo Workflow
A practical workflow can follow these steps:
- Research the landmark and choose a quieter time.
- Explore less crowded viewpoints.
- Prepare the composition before people move away.
- Take several images or use burst mode.
- Try a detail shot or a different focal length.
- Keep the best original file.
- Remove only small, distracting elements.
- Review the edited image at full size.
- Create versions for social media, print, or web banners.
- Keep the original and final files together.
This approach combines planning, photography, and light editing. It does not depend on one tool or one perfect moment.
Final Thoughts
Crowd-free travel photos are often created through small decisions rather than one complicated trick. Visiting at a quieter time, moving away from the obvious viewpoint, using composition to guide attention, and taking several frames when a gap appears can all help.
Editing can help remove small distractions, but it works best when the original photograph already has a clear subject and balanced composition. Careful use of AI, protection of the landmark’s important details, and retention of the original image provide a sound basis for editing.
With a little planning and thoughtful editing, travellers can create photos that feel cleaner, more personal, and better suited to the layouts where they want to share them.